


Learn how to master Google Meet with this step-by-step guide! Discover how to create a Google account, schedule meetings via Google Calendar, invite participants, and leverage features like screen sharing and live captions. Plus, explore Nearity’s premium hardware solutions to optimize audio/video clarity. Troubleshoot connectivity issues and ensure compliance with best practices for productive virtual sessions. Perfect for professionals, educators, and hybrid teams!
Have you ever felt overwhelmed trying to schedule a video call, wondering if your virtual meeting will work as planned, or simply frustrated by confusing settings? I’ve been there, and I’m here to show you exactly how to overcome these hurdles. Today, I’m sharing my complete guide on how to setup a google meet, so you can enjoy stress-free, seamless virtual meetings every time!
In this guide, I’ll walk you through everything from creating a Google account (if you don’t have one) to setting up your meeting, inviting participants, and troubleshooting common issues. By the end, you’ll feel confident and ready to host professional meetings that run like clockwork.
Google Meet Setup: Getting Started with Google Meet
Before diving into the detailed steps, I want to address the questions that have been on my mind (and perhaps on yours too) and make sure that you have done good preparation:
Why should I choose Google Meet over other platforms?
In my experience, Google Meet’s simplicity and seamless integration with Google services make it a standout option for both personal and professional meetings. Some of the standout features include:
- Ease of Use: The interface is clean and intuitive.
- Integration: It works seamlessly with other Google apps, especially Google Calendar.
- Reliability: Even on slower networks, Google Meet generally performs well.
- Security: Robust measures are in place to protect your privacy. Google Meet uses encryption and strong authentication methods to ensure your meetings remain private.
These benefits make Google Meet an excellent choice for anyone needing to connect with colleagues, friends, or family.
What are the essential features of Google Meet I need to know?
Google Meet offers robust video conferencing tools like screen sharing, real-time captions, and integrated chat—all without overwhelming you with too many options.
System Requirements and Compatibility for Google Meet
Before you begin, make sure your system meets the basic requirements for Google Meet:
- Browser Compatibility: Google Meet works best on Chrome, Firefox, Safari, and Edge.
- Internet Connection: A stable broadband connection is ideal for smooth video streaming.
- Devices: Whether you’re on a desktop, laptop, or mobile device, Google Meet adjusts to your screen size, making it accessible for everyone.
Nearity Hardware for Google Meet Excellence
To elevate your virtual meeting experience, pairing Google Meet with high-quality hardware can make a significant difference. At Nearity, we design devices specifically to enhance clarity, collaboration, and convenience. Below are our top recommendations for seamless Google Meet sessions:
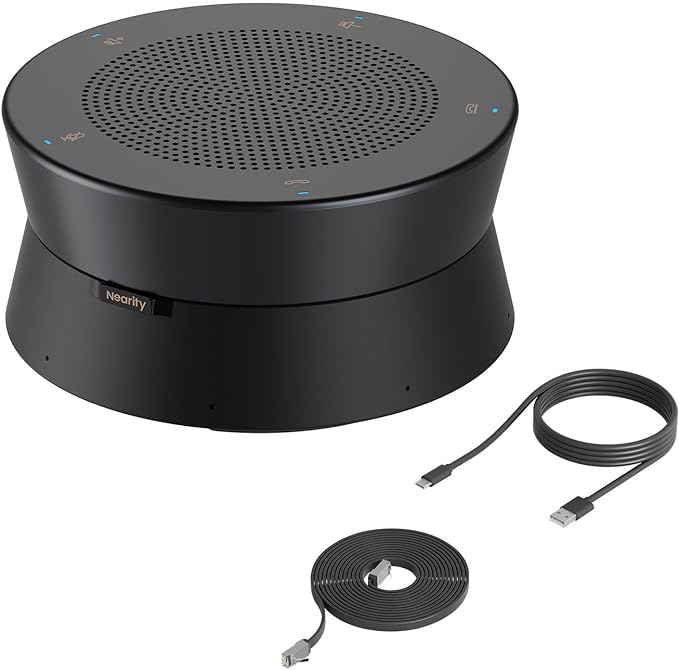
- AI-Powered Noise Reduction: Eliminates over 300 common background noises (e.g., keyboard clicks, air conditioning).
- Daisy Chain Capability: Connect multiple devices to adapt to rooms of all sizes.
- Full-Duplex Technology: Enables natural, interruption-free conversations.
- Plug-and-Play Compatibility: Works instantly with Google Meet, Zoom, Slack, and other UC platforms.
Key Benefits:
- Clear Communication: Built-in echo cancellation and omnidirectional microphones capture voices from all directions.
- Scalability: Ideal for small huddles or large conference rooms.
👉 Explore A20S
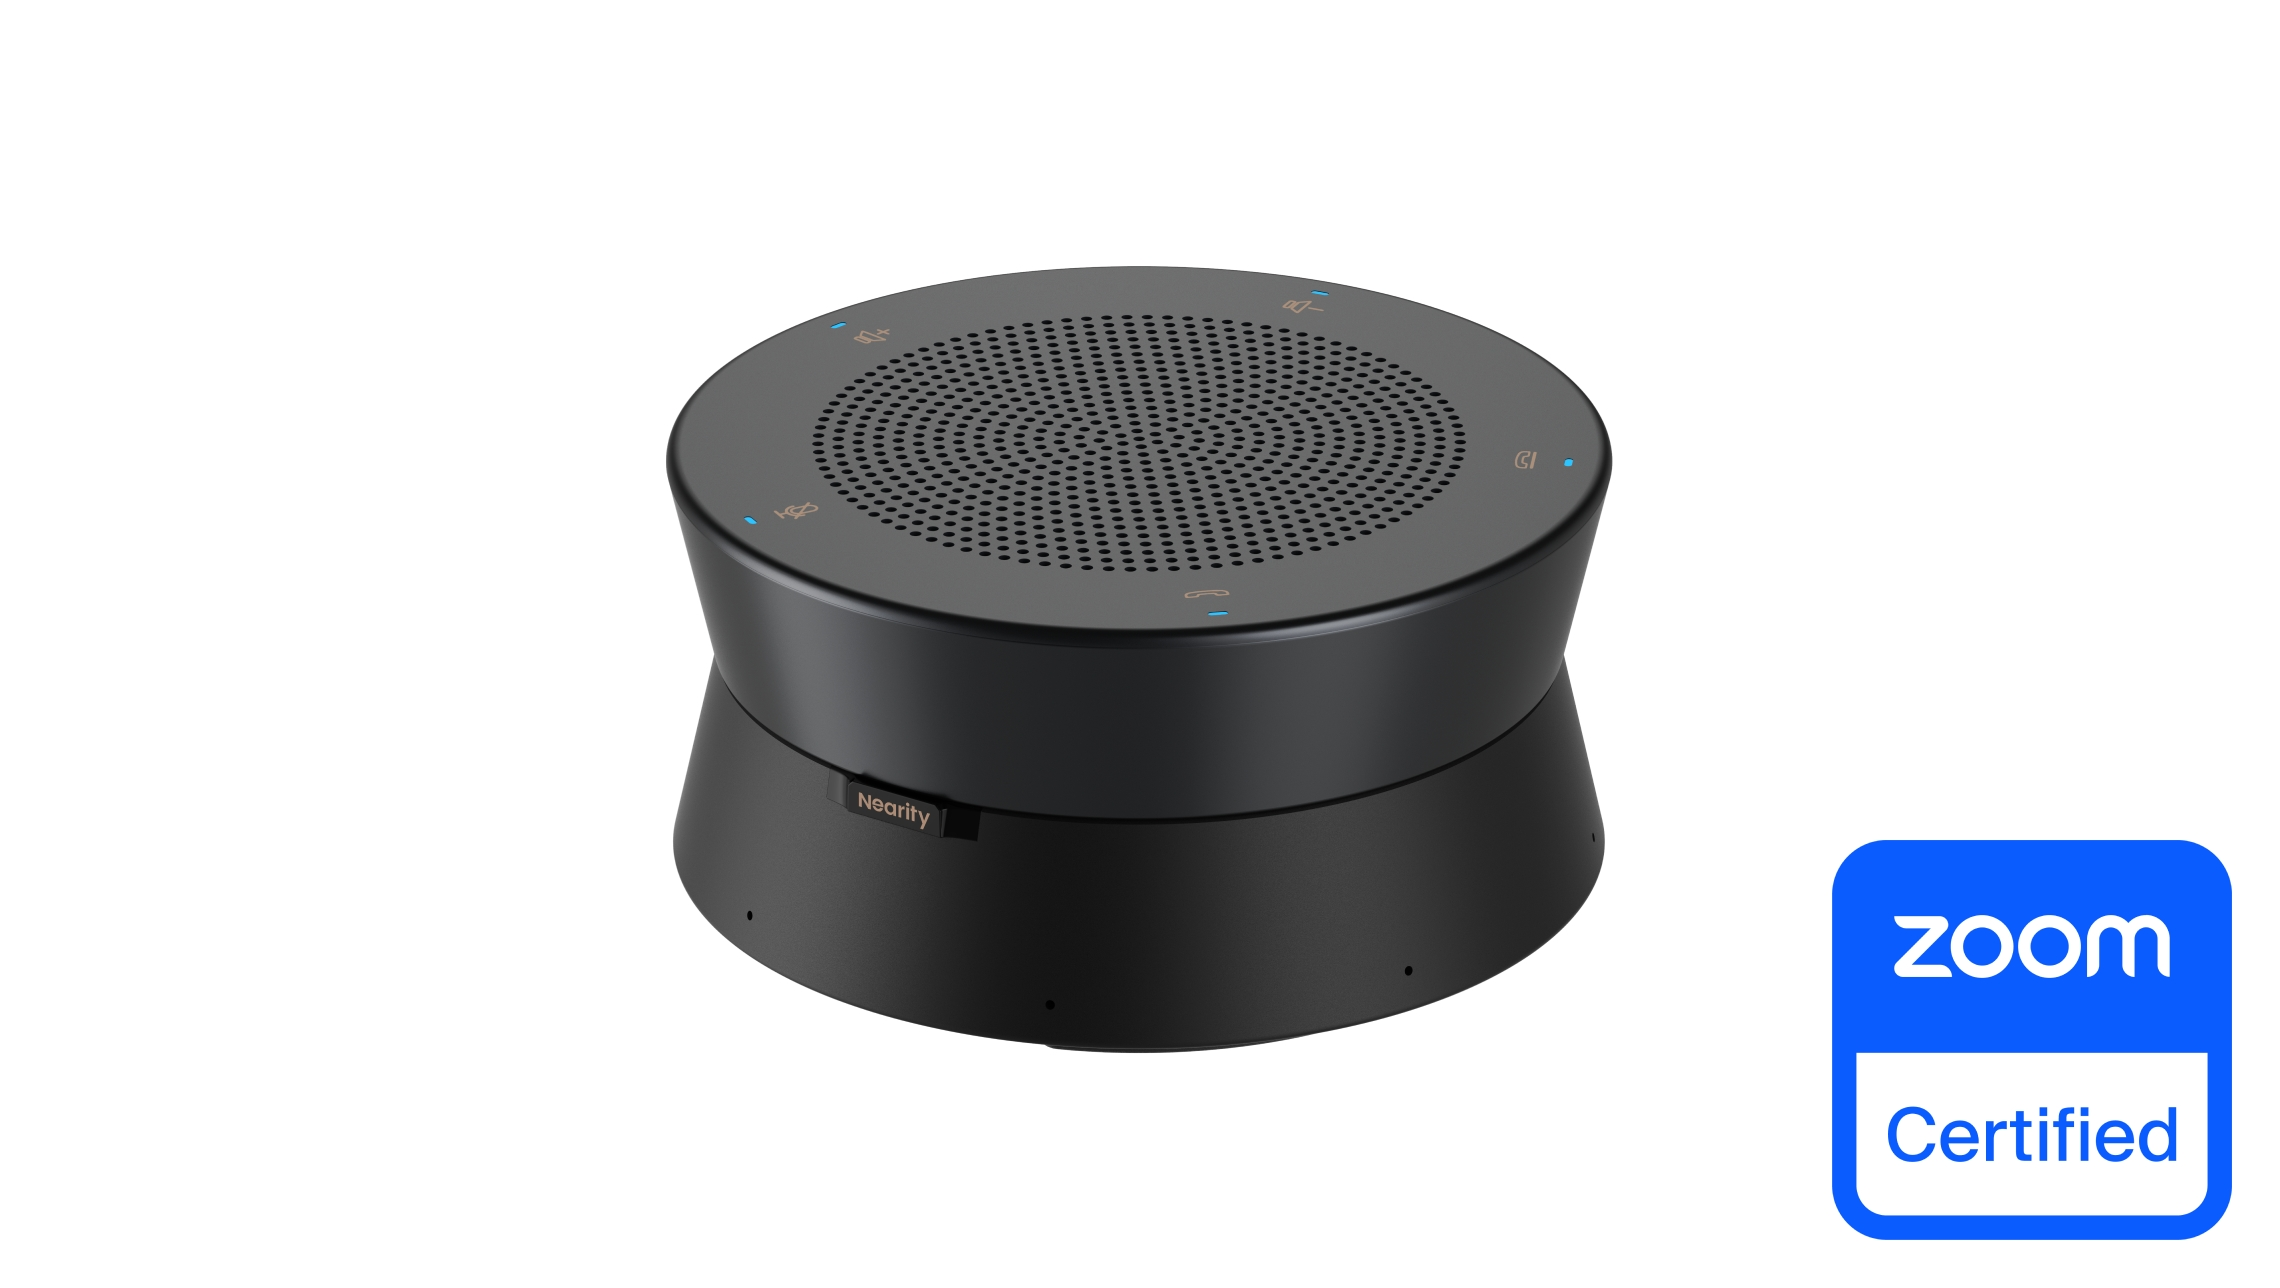
- 360° Audio Coverage: 8-mic beamforming array picks up voices evenly across rooms.
- Gen 2 AI Algorithms: Reduces reverb, echo, and 300+ ambient noises automatically.
- Flexible Connectivity: USB and PoE options for easy setup.
- Daisy-Chain Support: Expand coverage for larger classrooms or meeting halls.
Perfect For:
- Team brainstorming sessions, virtual classrooms, or boardroom discussions.
👉 Discover A21S
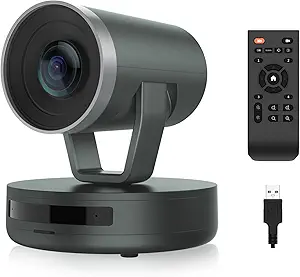
- 10x Hybrid Zoom & Auto Focus: Capture crystal-clear 2K QHD video, even at maximum zoom.
- 350° Pan & 60° Tilt: Remote-controlled adjustments for perfect framing.
- AI Noise Cancellation: Dual microphones deliver clear audio within an 8-meter radius.
- Privacy Protection: Automatic lens retraction and physical cover for security.
Why Choose It?
- Ideal for executives, educators, or anyone requiring studio-quality visuals.
👉 Learn About V410

- 4K UHD Resolution & 120° Wide Angle: Frame up to 10 participants in sharp detail.
- Auto Framing & Focus: Advanced AI keeps you centered, even when moving.
- MEMS Microphone Array: Captures voices clearly from 4 meters away.
- One-Touch Privacy: Slide-to-cover lens and deep-learning noise reduction.
Best For:
- Small team huddles, hybrid meetings, or solo presenters needing professional polish.
👉 Know More About V30
All Nearity hardware is rigorously tested for compatibility with Google Meet and other leading platforms (Zoom, Microsoft Teams, Slack). With plug-and-play simplicity and enterprise-grade performance, our devices ensure your meetings are productive, secure, and free from technical distractions.
Understanding these fundamentals makes it easier to appreciate the next steps and ensures you have the right mindset for setting up your meetings effortlessly. Now, let’s break it down!
Google Meeting Setup: Creating Your Google Account (If Needed)
If you already have a Google account, you can skip this section. But if you’re new to the Google ecosystem, setting up an account is the first step.
Step-by-Step Guide to Creating a Google Account
I remember the first time I set up my Google account — it was straightforward and quick! Here’s how you can do it:
- Visit the Google Sign-Up Page: Go to accounts.google.com/signup.

- Fill Out Your Details: Enter your first and last name. Create a unique username that reflects your identity or brand. Then, set a strong password. Remember, a mix of letters, numbers, and symbols makes for a secure password.
- Verify Your Account: Google will ask you to verify your account using a phone number. This extra layer of security is vital for protecting your account.
- Agree to the Terms and Conditions: Read through Google’s privacy policy and terms of service, then click “I Agree.”
- Complete Your Profile: Add a profile picture and any additional details to personalize your account. This step isn’t mandatory, but it helps create a professional image.
Now that you have a Google account, you’re ready to dive into setting up Google Meet.
Benefits of a Google Account for Virtual Meetings
Having a Google account doesn’t just allow you to use Google Meet; it opens up a world of integrated services:
- Google Calendar Integration: Easily schedule meetings and set reminders.
- Google Drive: Store and share files with your meeting participants.
- Gmail: Seamlessly invite contacts to your meetings directly from your email.
These integrations streamline your workflow, making it easier than ever to manage all aspects of your virtual meetings.
Setup Google Meet: How to Launch Google Meet on Different Devices
One of the things I appreciate about Google Meet is its flexibility. Whether you’re using a desktop or mobile device, you can quickly join or start a meeting.
Using Google Meet on a Web Browser
To use Google Meet on your computer, follow these simple steps:
- Open Your Browser: I usually launch Google Chrome, as it’s fully optimized for Google Meet.
- Navigate to Google Meet: Type meet.google.com in your address bar and hit enter.
- Sign In: If you’re not already logged in, sign in with your Google account.
- Join or Start a Google Meeting: You’ll see options to “New Meeting” or enter a meeting code if you have one.
Using a browser is perfect for home or office settings, as it provides a full range of meeting controls and high-quality video.
Accessing Google Meet on Mobile Devices
For those on the go, Google Meet is just as efficient on mobile. Here’s how to get started:
- Download the App: Search for “Google Meet” in the App Store (for iOS) or Google Play Store (for Android) and install it.
- Open the App and Sign In: Use your Google account to sign in, just like on the web.
- Start or Join a Meeting: Tap the “New Meeting” button to begin, or join an existing meeting by entering the meeting code.
- Optimize for Mobile: Mobile devices offer handy features like background blur and tap-to-focus controls, making your meeting experience smoother.
If you’re interested in optimizing your device settings for virtual meetings, check out my detailed tech optimization guide for more tips.
How to Setup a Google Meet: Scheduling Your First Meeting
Now comes the exciting part: scheduling your very first Google Meet session. I’ve found that planning ahead makes all the difference. Here’s how I do it.
Starting a Meeting Instantly
Sometimes, you just need to start a meeting right away. Here’s what I do:
- Go to the Google Meet Homepage: Once signed in, click “New Meeting.”
- Choose “Start an Instant Meeting”: This option immediately opens a meeting room for you.
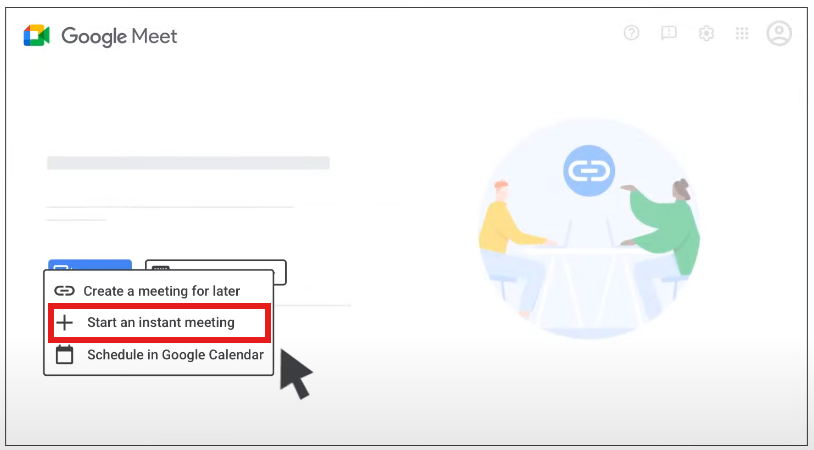
- Invite Participants: Share the meeting link with your colleagues or friends via email, text, or your preferred messaging app.
This method is perfect for impromptu meetings or quick catch-ups when time is of the essence.
Scheduling Meetings via Google Calendar
For more formal meetings, I always use Google Calendar. It allows me to plan, invite, and even add a Google Meet link automatically. Here’s how:
- Open Google Calendar: Navigate to calendar.google.com.
- Create an Event: Click on the desired date and time, then select “Create.”
- Add Google Meet Conferencing: In the event details, click “Add Google Meet video conferencing.” This automatically generates a meeting link.
- Invite Guests: Enter the email addresses of your participants. I always double-check for typos to ensure everyone receives the invite.
- Save and Send: Once you’re satisfied, click “Save” and then “Send” to dispatch the invitations.
Using Google Calendar not only streamlines scheduling but also keeps all your meetings organized in one place. You can even set up recurring meetings if you meet with the same team regularly.
Integrating Google Meet with Other Calendars
While Google Calendar is excellent, sometimes you might prefer using another calendar system. The good news is that Google Meet links can often be integrated with other calendars like Outlook or Apple Calendar. I usually follow these steps:
- Copy the Google Meet Link: After scheduling your meeting in Google Calendar, copy the meeting link.
- Create an Event in Your Preferred Calendar: Open your Outlook or Apple Calendar, and create a new event.
- Paste the Link in the Description: Make sure your invitees have easy access to the Google Meet link by including it in the event description.
- Send Out Invitations: Once done, send out your invites as usual.
This flexibility means you’re not locked into one ecosystem and can work seamlessly across different platforms.
Google Meet Setup: Inviting Participants and Managing Access
Once your meeting is scheduled, the next step is to ensure that everyone who needs to be there can join with ease. Inviting participants and managing their access is a critical part of the setup process.
How to Invite Participants to a Google Meet
Inviting people to a meeting can be as simple as copying a link or sending an invitation directly from Google Calendar. Here’s what I do:
- Via Google Calendar: When creating an event, I add the email addresses of my guests. Google Calendar sends an automated invitation that includes the Google Meet link.
- Direct Sharing: If I’m starting an instant meeting, I simply copy the meeting URL from the Google Meet interface and paste it into a message or email.
- Social Media & Messaging Apps: Sometimes, I share the meeting link on social platforms or team collaboration apps like Slack for quick access.
Using these methods, I ensure that every participant knows when and how to join the meeting, reducing the chances of technical hiccups.
Managing Permissions and Participant Settings
One of the aspects I appreciate about Google Meet is the control it gives you as a host. Here are some tips on managing permissions:
- Admitting Participants: I often set up meetings where I can control who enters. This means participants wait in a virtual lobby until I let them in. This extra step is especially useful for public or larger meetings.
- Muting Participants: For larger meetings, I like to mute participants on entry to prevent background noise. You can easily unmute individuals when it’s their turn to speak.
- Screen Sharing Permissions: Depending on the nature of the meeting, you might want to restrict screen sharing to only the host. This can be adjusted in the meeting settings.
- Recording Meetings: Recording is a handy feature if you need to refer back to a discussion or share the meeting with absent participants. I always inform my participants before I start recording.
Internal link suggestion: If you’re curious about detailed best practices for managing virtual meetings, check out my meeting management guide.
Google Meeting Setup: Advanced Features and Best Practices
After mastering the basics, I believe it’s time to dive into some advanced features that elevate your Google Meet experience. These features not only make your meetings more interactive but also ensure that everything runs smoothly.
Utilizing Google Meet Controls Effectively
I’ve learned that knowing where all the meeting controls are can save you a lot of time. Here’s a quick rundown:
- Meeting Menu: Located at the bottom of your screen, this menu gives you quick access to essential controls like mute, camera on/off, and settings.
- Participant List: You can see who’s in the meeting at a glance. This helps in managing large meetings and ensuring everyone is accounted for.
- Chat Function: The chat function is ideal for sharing links or notes without interrupting the flow of the conversation.
Knowing these controls has made my meetings more efficient and less stressful.
Screen Sharing, Recording, and Live Captions
There are several features that can enhance your virtual meeting experience:
- Screen Sharing: Whether you’re giving a presentation or collaborating on a document, screen sharing is an invaluable tool. I always test my screen sharing before starting to ensure there are no glitches.
- Recording: Google Meet allows you to record your meetings. This is perfect for team members who can’t attend the live session or if you simply want to review the discussion later.
- Live Captions: For accessibility, Google Meet provides live captions. I find this particularly useful during meetings with participants who may have hearing difficulties or for noisy environments.
These advanced features make Google Meet a robust solution for both professional and personal use.
Best Practices for a Smooth Virtual Meeting Experience
Over time, I’ve gathered a few best practices that help make every meeting a success:
- Plan Ahead: Always have an agenda. This keeps the meeting focused and ensures that all important points are covered.
- Test Your Setup: Before a big meeting, I test my microphone, camera, and internet connection. This proactive approach avoids last-minute hiccups.
- Engage Your Audience: Encourage participation by asking questions and using interactive features like polls.
- Follow Up: After the meeting, I send out a summary and any relevant documents. This helps keep everyone on the same page.
These tips have been game-changers for me, ensuring that every meeting is productive and professional.
Setup Google Meet: Troubleshooting Common Issues
Even with the best preparation, technical issues can sometimes arise. Over the years, I’ve encountered and resolved many common issues. Here’s what to do when things don’t go as planned.
Audio and Video Troubleshooting Tips
One of my biggest worries before every meeting used to be: “Will my audio and video work properly?” Here are some troubleshooting steps I follow:
- Check Your Hardware: Ensure that your microphone, speakers, and camera are properly connected and functioning. I always perform a quick test using my device’s settings.
- Browser Permissions: Sometimes, your browser might block access to your camera or microphone. Verify that Google Meet has the necessary permissions in your browser settings.
- Restart Your Device: If you’re experiencing persistent issues, a simple restart often resolves them. I recommend rebooting your device before any major meeting.
- Use Headphones: To minimize echo or feedback, I always opt for headphones. This small change can make a big difference in audio quality.
Connectivity and Performance Solutions
Connectivity issues are another common challenge. Here’s how I handle them:
- Test Your Internet Speed: Use an online speed test to ensure you have a stable connection. If you’re on Wi-Fi, consider moving closer to your router.
- Close Unnecessary Applications: Running too many programs can slow down your computer. I always close any apps that aren’t needed during a meeting.
- Switch to a Wired Connection: If possible, using an Ethernet cable provides a more reliable connection than Wi-Fi.
- Use a Backup Plan: Always have a backup device or plan (like a smartphone with mobile data) in case your primary connection fails.
For more detailed advice on troubleshooting, I’ve written an in-depth tech troubleshooting guide that you might find helpful.
FAQs About Setting Up Google Meet
Here are some of the most frequently asked questions I encounter about Google Meet setup:
Q1: How do I join a Google Meet meeting if I don’t have a Google account?
A: You can join a Google Meet meeting without a Google account if the host allows guests. However, having an account gives you more control over your experience and access to additional features.
Q2: Can I record my Google Meet session without notifying participants?
A: Google Meet typically shows a recording notification to all participants when a session is being recorded. It’s best practice (and sometimes legally required) to inform everyone before recording.
Q3: How do I fix issues with my microphone or camera in Google Meet?
A: First, check your device settings and ensure your browser has permission to use your microphone and camera. If issues persist, try restarting your device or switching browsers.
Q4: Is there a time limit on Google Meet sessions?
A: For personal Google accounts, meetings may be limited in duration, while Google Workspace accounts often have longer or unlimited meeting durations. Always check your account’s specific limits.
Q5: Can I schedule recurring meetings in Google Meet?
A: Yes, using Google Calendar, you can set up recurring meetings by selecting the “repeat” option when scheduling your event.
Q6: How do I share my screen during a meeting?
A: In the meeting controls, click on the “Present now” button and choose the window or screen you want to share. This function works seamlessly on both desktop and mobile devices.
Wrapping Up: My Final Thoughts on Google Meet Setup
Google Meet simplifies virtual meetings with its intuitive design and seamless integration with Google tools. This guide has walked you through creating accounts, scheduling sessions, and leveraging features like screen sharing and live captions. A standout tip? Pairing Google Meet with high-quality hardware, such as Nearity’s speakerphones and cameras, ensures crystal-clear audio and video, enhancing collaboration in any space.
Key takeaways: Preparation is crucial—test your setup, plan agendas, and familiarize yourself with controls. Troubleshooting common issues like connectivity or audio glitches will keep meetings running smoothly. Google Meet’s reliability and ease of use make it ideal for both personal and professional use, and with the right tools, you’ll host confident, productive sessions every time.
Ready to elevate your virtual meetings? Put these steps into action and enjoy stress-free connections. Happy meeting!


